The usage of Green Screen has increased a lot. Independent filmmakers for a cinematic feel, and content creators for YouTube vlogs, or business ads are using it more frequently nowadays. This technique has become a go-to trick in video production. But after the shoot, the real magic happens in the editing room. Where professional VFX editors remove green screens from video to add a required background to the scene. Let us know step by step, how the Green Screen Remover process is done like a pro. But before that, let us gain technical skills and tool-related knowledge.
Why Is Green Screen Used?
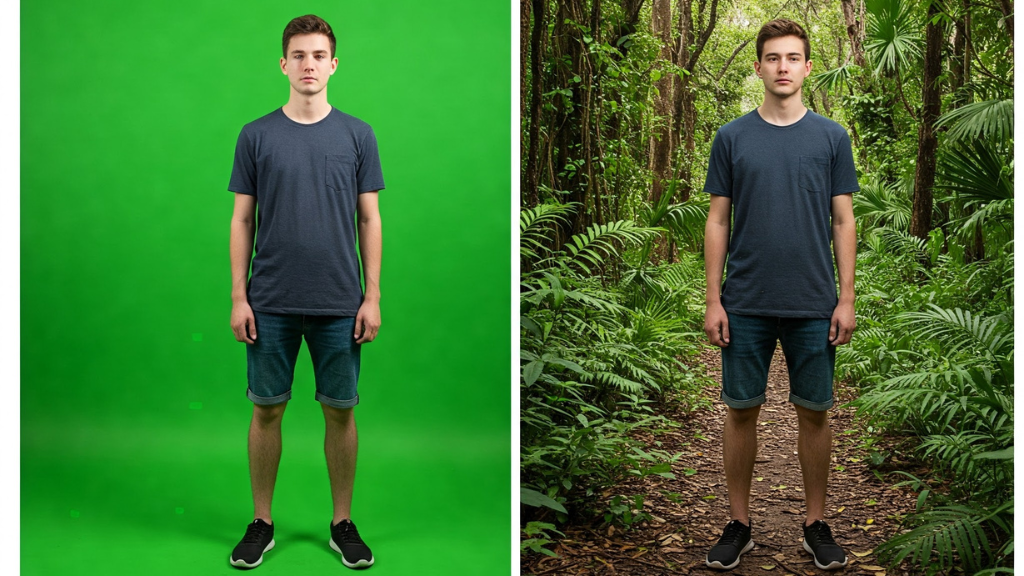
This technique provides an opportunity for the creators to add custom backgrounds, special effects, or immersive environments without needing to shoot on live location.
Why Learn to Remove Green Screen from Video?
It gives you the creative power to:
1. Add any background you like.
2. Shoot cost-effective content from one place.
3. Create engaging and cinematic visuals.
4. Save time on complicated location-based filming.
5. Add visual consistency to your videos.
This skill can enhance your content to a pro-level whether you are a content creator, video editor, marketer, or business owner.
Tools For Green Screen Removers
Popular tools used by green screen background editor:
1. Adobe Premiere Pro
2. Final Cut Pro
3. DaVinci Resolve
4. Camtasia
5. CapCut (Mobile)
6. iMovie
7. VSDC Free Video Editor
8. Online Tools like Unscreen & Kapwing
Remove Green Screen from Video In Seven Steps!
Step 1:
Import Your Video
1. Open your video editing software and import your green screen footage.
2. Also, import the background video you want to replace it with.
Step 2:
Drag Footage to Timeline
1. Add the footage on the video timeline (usually on the top layer).
2. Place the new background on the layer below.
Step 3:
Apply Chroma Key Effect
1. Locate the Chroma Key in your software.
2. Apply the effect to the green screen video clip.
Step 4:
Select the Green Color
1. You can use the eyedropper tool to select the green area in the video.
2. This software will remove all pixels matching that color automatically.
Step 5:
Fine-Tune the Key
1. Adjust settings like:
- Transparency.
- Edge Feather.
- Spill Suppression.
- Contrast & Brightness.
2. To ensure smooth blending and prevent harsh outlines.
Step 6:
Add Your Custom Background
1. You can add your desired video in the background after the green screen is removed.
2. Resize or reposition it as needed to match the subject.
Step 7:
Export Your Final Video
1. Render your video in the required format and resolution, once you are happy with the result.
Tips for Better Results In Green Screen Remover
1. You must avoid shadows or wrinkles on the green screen during shooting.
2. You must ensure even lighting for cleaner keying.
3. You can use higher-resolution footage for more detail.
4. Make sure your subject is not wearing green!
5. Preview the result on multiple devices before final export.
Why Does This Skill Matter in 2025?
The green screen editing has become an essential part of Reels, YouTube Shorts, and virtual content. It is empowering more Video creators than ever to look professional without spending lots of penny.
Green Screen Remover is a technical tool, but quite easy to process and create fun videos from home or professional marketing content for the office. The game changer that all independent filmmakers are searching for! It is time to unleash your creativity and replace that green screen obstacle with your vision and desire.